Browse
Shopping Cart

Best iPhone Lenses for Low Light Photography | Camera Lens Camera

Best iPhone Lenses for Low Light Photography | Camera Lens Camera

This article explores the best iPhone camera lens camera for low light photography, providing you with the tools you need to take exceptional photos, even in dimly lit environments.

Capturing stunning photographs in low light can be a challenge for any photographer, and this is especially true when using a smartphone.

While iPhones have made significant advancements in camera technology, enhancing your iPhone's capabilities with a high-quality camera lens camera can make a world of difference.

Find iPhone 11 Camera Lens Repair Shops Near You in UK

Why Use External Lenses for Low Light Photography?

1. Enhanced Light Gathering

External camera lens camera designed for low light conditions often have larger apertures, allowing more light to enter the camera.

This results in brighter and clearer images, reducing the noise and grain that are common in low light photos.

2. Improved Focus and Detail

These camera lens camera can enhance the iPhone’s ability to focus in poor lighting and bring out finer details in the scene.

This is particularly useful for capturing the subtleties of nightscapes or indoor settings with limited lighting.

3. Versatility and Creative Control

Using external lenses expands your creative possibilities, giving you more control over the depth of field, perspective, and overall look of your photos.

Whether you want to capture wide-angle views, detailed close-ups, or artistic effects, there’s a camera lens camera for every need.

Top Lenses for Low Light Photography with iPhone

1. Moment Wide 18mm Lens

The Moment Wide 18mm Lens is a top choice for low light photography. With its large aperture and high-quality glass, this lens captures more light and produces sharp, vibrant images even in challenging lighting conditions.

Its 18mm focal length offers a wider field of view than the standard iPhone lens, making it perfect for nightscapes and low light environments where capturing more of the scene is beneficial.

2. Olloclip Super-Wide Essential Lens

The Olloclip Super-Wide Essential Lens is known for its superior low light performance.

This camera lens camera provides a broad 120-degree field of view, allowing you to capture expansive scenes with minimal distortion. Its design ensures that more light reaches the camera sensor, resulting in brighter and clearer images.

It’s an excellent choice for shooting in dimly lit indoor settings or capturing wide nightscapes.

3. Sandmarc Telephoto Lens

The Sandmarc Telephoto Lens offers a 60mm focal length, which is ideal for portrait and low light photography.

Its large aperture and high-quality optics allow for greater light transmission, reducing noise and enhancing detail in your photos.

This lens is particularly useful for isolating subjects in low light conditions, such as capturing portraits with a beautifully blurred background.

4. Xenvo Pro Lens Kit

The Xenvo Pro Lens Kit includes a wide-angle lens that is optimized for low light conditions.

The lens is crafted with high-grade optical glass and an advanced coating to minimize glare and enhance light capture. This makes it suitable for a variety of low light situations, from indoor photography to twilight landscapes.

5. Aukey Ora Lens Kit

The Aukey Ora Lens Kit features a 0.45X wide-angle lens and a 15X macro lens, both designed to improve your iPhone's performance in low light.

The wide-angle camera lens camera offers a broader view with enhanced light gathering capabilities, while the macro lens allows you to capture detailed close-ups even in dim lighting.

The high-quality construction ensures that your photos remain sharp and clear, regardless of the lighting conditions.

Camera Lens Camera

Factors to Consider When Choosing a Low Light Lens

1. Aperture Size

A larger aperture allows more light to reach the camera sensor, which is crucial for low light photography. Look for lenses with wide apertures, indicated by a lower f-number (e.g., f/1.8, f/2.0).

2. Lens Quality

High-quality glass and coatings can significantly improve light transmission and reduce optical aberrations. This is essential for maintaining image clarity and reducing noise in low light photos.

3. Compatibility

Ensure that the lens is compatible with your specific iPhone model. Many lenses attach using clips or mounting systems that are designed to fit a range of devices.

4. Field of View

Consider the type of photography you plan to do. Wide-angle lenses are great for capturing broad scenes in low light, while telephoto lenses are better suited for isolating subjects or shooting at a distance.

5. Build and Durability

A well-constructed lens is essential for consistent performance, especially in challenging conditions. Look for lenses made with robust materials that can withstand regular use and transport.

Tips for Low Light Photography with iPhone Lenses

1. Stabilize Your iPhone

Low light conditions often require longer exposure times, which can introduce blur from camera shake. Using a tripod or stabilizer can help keep your iPhone steady, resulting in sharper images.

2. Use Manual Settings

Take advantage of apps that allow you to manually adjust settings like ISO, shutter speed, and focus. This gives you greater control over how your iPhone captures light and can improve your results in low light.

3. Experiment with Light Sources

Look for natural or artificial light sources to enhance your photos. Streetlights, candles, and even moonlight can add interesting lighting effects to your low light images.

4. Post-Processing

Editing your photos can help bring out details and correct exposure issues that are common in low light photography. Apps like Adobe Lightroom and Snapseed offer powerful tools for enhancing your images.

5. Practice and Patience

Low light photography can be challenging, but with practice and experimentation, you can learn to capture beautiful images in any lighting condition.

Take your time to explore different settings and techniques to find what works best for you.

Investing in a high-quality camera lens camera for your iPhone can significantly enhance your ability to capture stunning photos in low light conditions.

Whether you prefer wide-angle vistas, detailed close-ups, or creative effects, there’s a camera lens camera that can help you achieve your photography goals.

By understanding the capabilities of each lens and following some practical tips, you can transform your low light photography and create images that stand out.

Create Unique Photos with Fish-Eye Lenses for iPhone

In the world of smartphone photography, fish-eye lenses have become an essential tool for iPhone users who wish to add a unique perspective to their photos.

These lenses allow you to capture a much wider field of view, often providing a dramatic, hemispherical image that can turn everyday scenes into fascinating visual experiences.

Whether you’re an amateur photographer looking to experiment or a professional seeking to expand your creative toolkit, fish-eye lenses can transform your iPhone photography.

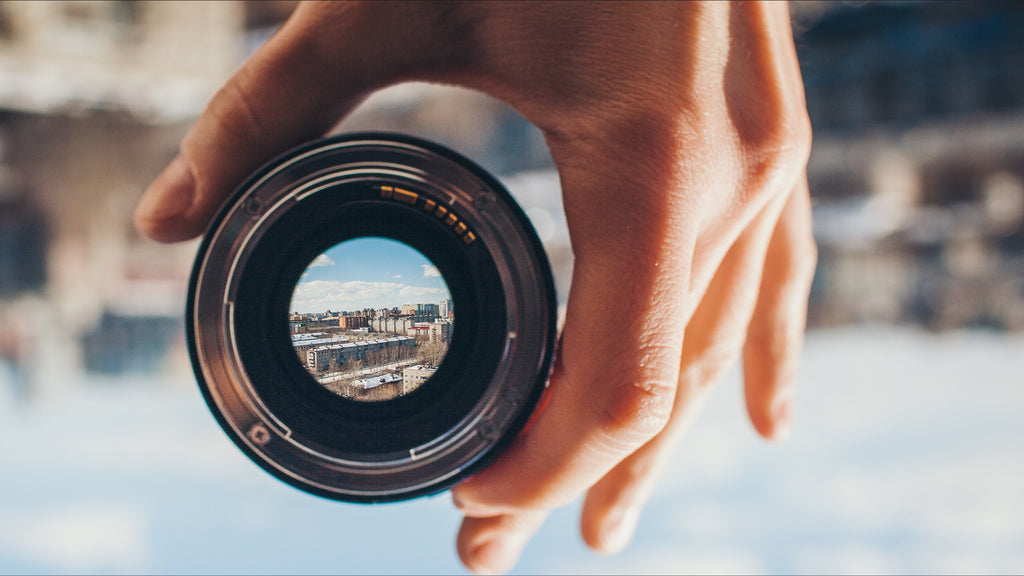
What is a Fish-Eye Lens?

A fish-eye lens is a wide-angle lens that produces strong visual distortion to create a panoramic or hemispherical image.

This effect simulates the way a fish might see the world underwater, hence the name.

Typically, fish-eye lenses offer a 180-degree field of view, which is significantly broader than the standard lenses found on smartphones.

This distinctive look is characterized by a spherical view, often with a noticeable curve at the edges of the frame.

Why Use a Fish-Eye Lens for iPhone?

1. Expansive Field of View

One of the primary advantages of using a fish-eye lens is its ability to capture an extremely wide scene in a single shot. This is particularly useful for:

  • Landscape Photography: Capture sweeping vistas without missing any part of the scene.
  • Architecture: Fit entire buildings or interiors into the frame without stepping back.
  • Group Photos: Include more people in your shots without the need for a selfie stick.

2. Creative Distortion

The fish-eye effect creates a unique visual distortion that can add artistic flair to your photos. This curvature can make ordinary subjects look extraordinary, adding a dynamic and engaging quality to your images. It’s a favorite tool for:

  • Action and Sports Photography: Convey speed and motion with dramatic effect.
  • Urban Exploration: Turn cityscapes into intriguing, almost otherworldly compositions.
  • Artistic Photography: Experiment with abstract shapes and unconventional viewpoints.

3. Enhanced Close-Ups

Fish-eye lenses allow for incredibly close focusing distances, making them excellent for capturing detailed close-ups with an expanded perspective. This can be particularly appealing for:

  • Nature and Macro Photography: Get up close with insects, flowers, and other small subjects.
  • Pet Photography: Create charming portraits with a fun, exaggerated look.

Choosing the Right Fish-Eye Lens for Your iPhone

Selecting the best fish-eye lens for your iPhone can significantly affect the quality and versatility of your photos. Here are some factors to consider:

Compatibility

Ensure the lens is compatible with your iPhone model. Some lenses attach directly to the iPhone’s camera using clips or magnetic mounts, while others might require a specific case.

Lens Quality

Look for lenses made with high-quality glass or optics. Poor-quality lenses can produce blurry images or significant chromatic aberration (color fringing around the edges of objects). Multi-coated camera lens camera tend to offer better image clarity and reduced glare.

Field of View

Fish-eye lenses come with varying degrees of field of view, typically ranging from 120 to 180 degrees. A wider field of view will provide a more pronounced fish-eye effect.

Build and Design

Consider the build quality and durability of the lens. Metal housings are generally more robust than plastic ones.

Additionally, look for lenses that come with protective covers or cases for easy transport and storage.

Price and Brand Reputation

While it’s tempting to go for the cheapest option, investing in a reputable brand often yields better results. Brands like Moment, Olloclip, and Black Eye are well-known for their high-quality iPhone lenses.

How to Repair Your iPhone XR Screen? FONES52

Top Fish-Eye Lenses for iPhone

Here are some of the best fish-eye lenses available for iPhone users:

1. Moment Fish-Eye 14mm Lens

Moment is renowned for its high-quality lenses, and the Fish-Eye 14mm is no exception. It offers a 170-degree field of view and is crafted with cinema-grade glass, ensuring sharp, high-contrast images.

Its rugged design and compatibility with Moment’s mounting system make it a top choice for serious photographers.

2. Olloclip Fisheye + Super-Wide + Macro Lens Set

Olloclip provides a versatile set that includes a fish-eye lens along with super-wide and macro lenses.

The fish-eye lens captures a 180-degree field of view, and the easy-to-use clip-on design makes it compatible with a wide range of iPhone models. The set is perfect for photographers who want flexibility in their shooting options.

3. Black Eye Pro Fish-Eye G4

The Black Eye Pro Fish-Eye G4 offers a 175-degree field of view and is known for its compact, lightweight design. It’s an excellent choice for mobile photographers who need a portable yet powerful camera lens camera for capturing wide-angle shots.

4. Apexel 238° Super Fish-Eye Lens

For those who want the most dramatic fish-eye effect, the Apexel 238° Super Fish-Eye Lens provides an ultra-wide angle view. It’s ideal for extreme sports or creative photography where a broader perspective is essential.

Tips for Capturing Stunning Photos with Fish-Eye Lenses

1. Embrace the Distortion

Don’t be afraid to experiment with the fish-eye effect. Position your subject at the center of the frame to minimize distortion, or place it towards the edges to exaggerate the curvature. This can create engaging and unexpected compositions.

2. Get Close

Fish-eye lenses allow you to get incredibly close to your subject while still capturing a wide scene. Use this to your advantage by filling the frame with interesting details, which can make your photos more dynamic and impactful.

3. Experiment with Angles

Changing your shooting angle can dramatically affect the outcome of your fish-eye photos. Try shooting from a low angle to enhance the sense of depth, or from above for a more comprehensive view of the scene.

4. Mind the Edges

Since fish-eye lenses often include more in the frame, pay attention to the edges of your photos. Watch out for unwanted elements or distractions that might detract from your main subject.

5. Use Software Corrections

Many photo editing apps offer tools to correct fish-eye distortion or enhance the effect further. Apps like Adobe Lightroom or Snapseed can be used to tweak your images, ensuring the final result matches your creative vision.

Fish-eye lenses are an exciting addition to any iPhone photographer’s toolkit.

Their ability to capture a broad field of view and create captivating, distorted images makes them invaluable for both creative exploration and practical applications.

By selecting the right lens and mastering a few techniques, you can significantly enhance your iPhone photography and produce stunning, unique images that stand out.

Elevate Your iPhone Photography with Macro Lenses

In an era where smartphone photography reigns supreme, the iPhone stands out as a powerhouse. With its advanced camera systems, it has revolutionized the way we capture the world.

Among the various genres of photography, macro photography offers a unique perspective, allowing us to delve into the intricate details of our surroundings.

In this guide, we explore how you can elevate your iPhone photography with macro lenses, unlocking a new dimension of creativity and detail.

Understanding Macro Photography

Macro photography is the art of capturing extreme close-ups, typically of small subjects, in high detail.

The essence of macro photography lies in its ability to reveal intricate details that are often invisible to the naked eye.

With a dedicated macro lens, your iPhone can transform into a powerful tool capable of exploring the minute details of the world around you.

Why Use a Macro Lens with Your iPhone?

While the iPhone's camera is highly versatile, adding a macro lens can significantly enhance its capability to capture fine details. Here's why a macro lens is essential for your iPhone photography:

  • Enhanced Magnification: Macro lenses offer superior magnification, allowing you to capture tiny details with stunning clarity.
  • Improved Focus: They provide the ability to focus on subjects that are incredibly close to the camera lens camera, which is difficult with standard iPhone lenses.
  • Creative Exploration: Macro lenses open up a world of creative possibilities, enabling you to explore textures, patterns, and details that are otherwise unseen.

Choosing the Right Macro Lens for Your iPhone

When it comes to selecting a macro lens for your iPhone, the market offers a plethora of options. Here are some key factors to consider:

1. Compatibility

Ensure that the macro lens you choose is compatible with your iPhone model. Different lenses are designed for different phone models, so check the specifications carefully.

2. Magnification Power

Macro lenses come with varying degrees of magnification. For general use, a 10x magnification is often sufficient. However, for more detailed work, consider lenses with higher magnification, such as 15x or 20x.

3. Build Quality

Look for lenses made from high-quality materials. Glass lenses tend to provide better image clarity than plastic ones. Additionally, a robust build ensures that your lens will withstand regular use.

4. Ease of Use

Consider how the camera lens camera attaches to your iPhone. Some lenses clip on easily, while others might require more complex mounting.

Choose a lens that aligns with your preferences for convenience and usability.

Top Macro Lenses for iPhone Photography

Here are some top-rated macro lenses that can elevate your iPhone photography:

Moment Macro Lens

Moment Macro Lens is renowned for its exceptional build quality and sharpness. It offers 10x magnification and features a glass lens for clear, distortion-free images. The lens comes with a removable light diffuser, which helps to evenly illuminate your subject.

Olloclip Macro Pro

The Olloclip Macro Pro lens offers a versatile set of macro lenses, including 7x, 14x, and 21x magnification. It is known for its compact design and ease of use. The lenses can be quickly swapped out, allowing you to choose the perfect magnification for your shot.

Apexel 100mm Macro Lens

The Apexel 100mm Macro Lens is ideal for photographers who need high magnification. It provides up to 20x magnification and features a robust aluminum body and high-quality glass optics. This lens is perfect for capturing extreme close-ups with incredible detail.

Xenvo Pro Lens Kit

The Xenvo Pro Lens Kit is a budget-friendly option that doesn't compromise on quality. It includes a 15x macro lens and a wide-angle camera lens camera, making it a versatile addition to your photography kit. The lenses are crafted from premium glass, ensuring sharp and vibrant images.

Tips for Capturing Stunning Macro Shots with Your iPhone

Achieving great macro shots with your iPhone requires more than just a good lens. Here are some tips to help you get the most out of your macro photography:

1. Steady Your Shot

Because macro photography involves extreme close-ups, even the slightest movement can blur your image. Use a tripod or stabilize your phone against a solid surface to ensure sharp shots.

2. Focus Manually

While the iPhone's autofocus is powerful, it can struggle with extreme close-ups. Use manual focus if your camera app supports it, or tap on the screen to focus on the specific area you want to highlight.

3. Use Adequate Lighting

Macro photography often requires more light than regular photography. Utilize natural light when possible, and consider using additional lighting, such as a ring light or the lens’s built-in diffuser, to ensure your subject is well-lit.

4. Experiment with Angles

Don’t be afraid to try different angles and perspectives. Move around your subject and explore different viewpoints to find the most interesting composition.

5. Adjust Your Exposure

Macro shots can benefit from adjusting the exposure to highlight the fine details. Tap and slide your finger up or down on the screen to increase or decrease the exposure in your iPhone’s camera app.

6. Post-Process Your Images

Editing is an important part of macro photography. Use apps like Adobe Lightroom or Snapseed to enhance your images. Adjustments to sharpness, contrast, and color can bring out the details in your shots.

Common Challenges and How to Overcome Them

Macro photography comes with its own set of challenges. Here’s how to tackle some common issues:

1. Shallow Depth of Field

At high magnifications, your depth of field (the area in focus) becomes very shallow. To manage this, make sure your primary point of interest is sharply focused, and consider shooting from slightly farther away to increase the depth of field.

2. Motion Blur

Even slight movements can cause blur in macro photography. Stabilize your phone as much as possible, use a tripod, and consider using the timer or remote shutter to avoid camera shake when pressing the shutter button.

3. Limited Lighting

Close-up shots often need more light. Use additional light sources and make use of reflectors to bounce light onto your subject. Adjusting the camera settings to increase ISO or using the built-in flash can also help.

4. Finding the Right Subject

Not everything looks great under a macro lens. Look for subjects with interesting textures, patterns, or colors. Nature provides plenty of opportunities, from the details of a flower petal to the intricate patterns on insects.

Exploring Creative Opportunities with Macro Photography

Macro photography isn’t just about capturing close-ups; it’s about discovering new perspectives. Here are some creative ideas to explore:

1. Nature’s Microcosm

Explore the small wonders of nature. Leaves, flowers, insects, and even water droplets can provide fascinating subjects for macro photography. Pay attention to textures, colors, and patterns.

2. Everyday Objects

Transform mundane items into works of art. Household objects like coins, fabric, or even the texture of a fruit’s skin can look surprisingly artistic under a macro lens.

3. Abstract Art

Focus on shapes, lines, and colors to create abstract images. Play with light and shadows to add depth and dimension to your photos.

4. Detailed Portraits

Capture the fine details of a person’s features. Eyes, lips, and hands can make compelling subjects when photographed up close.

Conclusion

Elevating your iPhone photography with a macro lens opens up a world of detailed exploration and creative possibilities. By understanding the nuances of macro photography, choosing the right lens, and employing effective techniques, you can capture stunning close-ups that reveal the intricate beauty of the world around you.